Hobonichi & Bullet Journal learnings: Anticipating 2017

Hobonichi & Bullet Journal learnings: Anticipating 2017

The last nine months have been busy in a way I have never known.  My Ph.D. is progressing well and I have written a couple of papers for publication, been rejected and lived to tell the tale.

My mind is always processing and I truly believe that thanks to the bullet journal system (all hail Ryder Carroll) I have captured more useful information than ever before.  I’ve also captured HEAPS of useless information of course but hindsight is 20/20 isn’t it!  Like my boss used to tell us every.single.day. “you don’t need it … until you do” and the devil is in the detail.  Just knowing the information has been captured all in one place that is easily accessible reduces the stress level by about 80%.

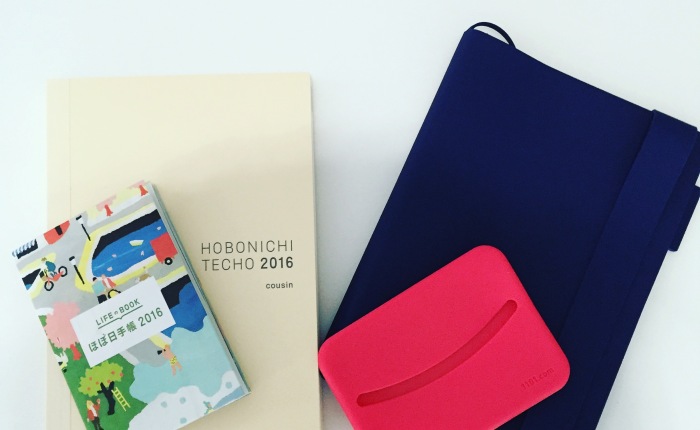
I started my bullet journal journey  105 weeks ago and have developed my own style which continues to evolve with me.  If I get sick of planning a certain way I change it up.  If I try something and it’s successful I keep doing it, if it’s not I stop!  It’s that simple.  I used to buy multiple diaries each year and I would be constantly scoping out new ones online because the system imposed upon me by the planner never quite suited me.  However, I think the Hobonichi Cousin, nine months on, is still ticking all the boxes.

The Japanese way of thinking about design, planning, and living involves a deeply considered approach; everything works together to deliver a superior experience for the user.

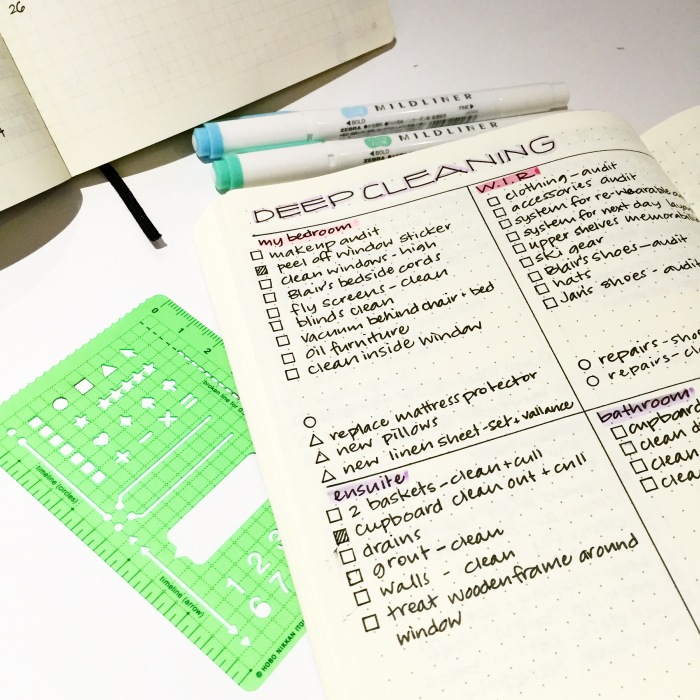
For example, the stencils they sell are exactly the right length for the timeline in the daily section of the Hobonichi Cousin and the bullet stencil is the perfect size for a 0.5mm ballpoint pen.  There are  circles and arrows to connect your bullet points to the timeline…I mean WOW.

img_3735

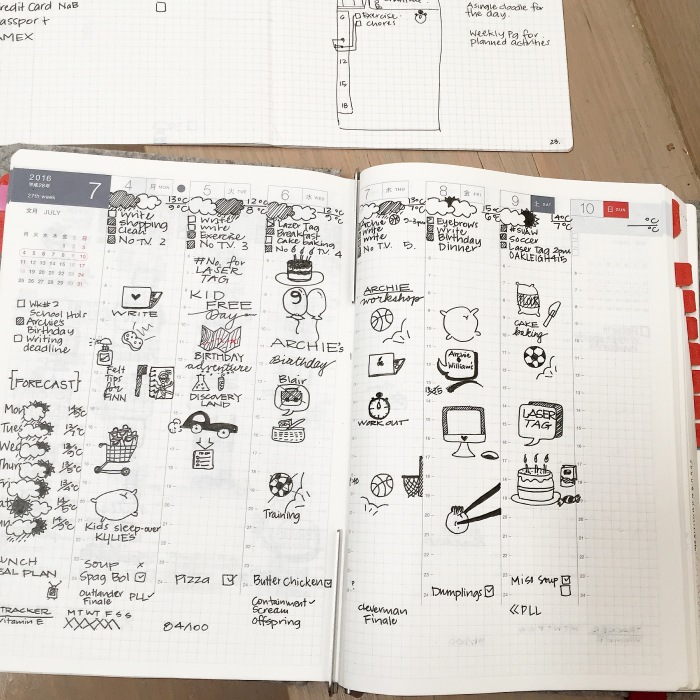
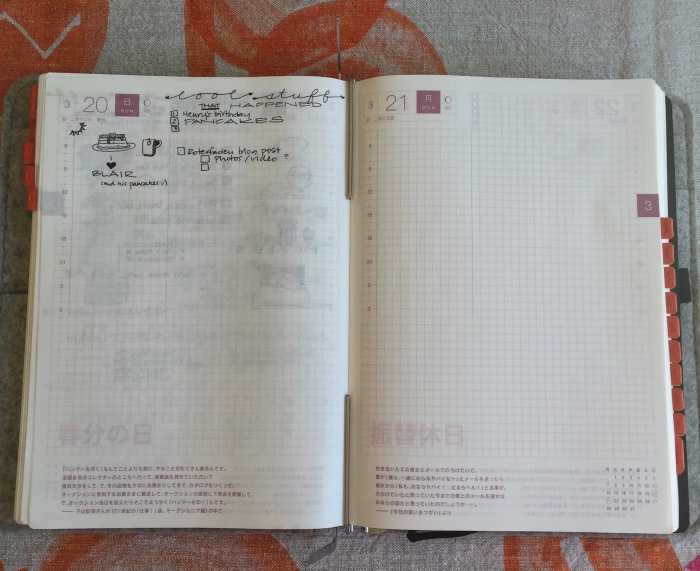
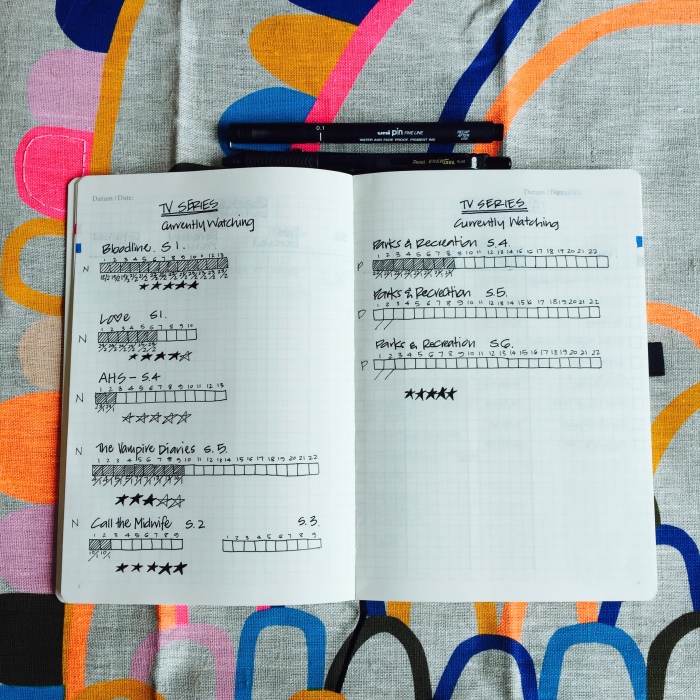
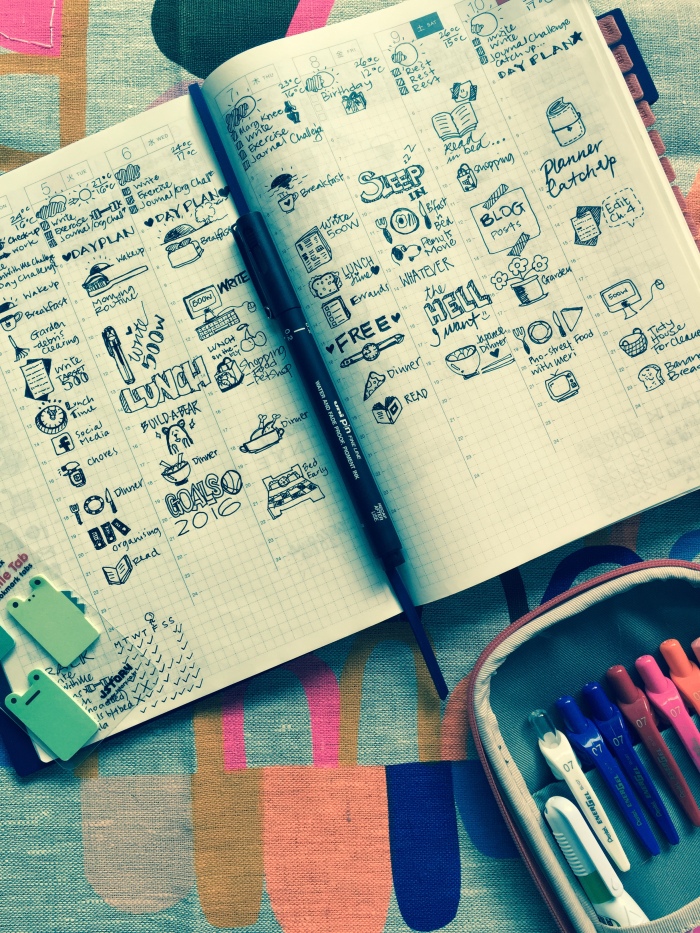
Precision and functionality in a fabulous package.  I stupidly overlooked the timeline that was plainly there on the left-hand-side of the daily page for months, I think because it was so integrated into the very soul of the Hobo.  When I saw all the vertical timelines being done by @honeyrozes @shilen.qc and many others in the BuJo Community I thought it looked like a great idea…so I did this:


img_3705

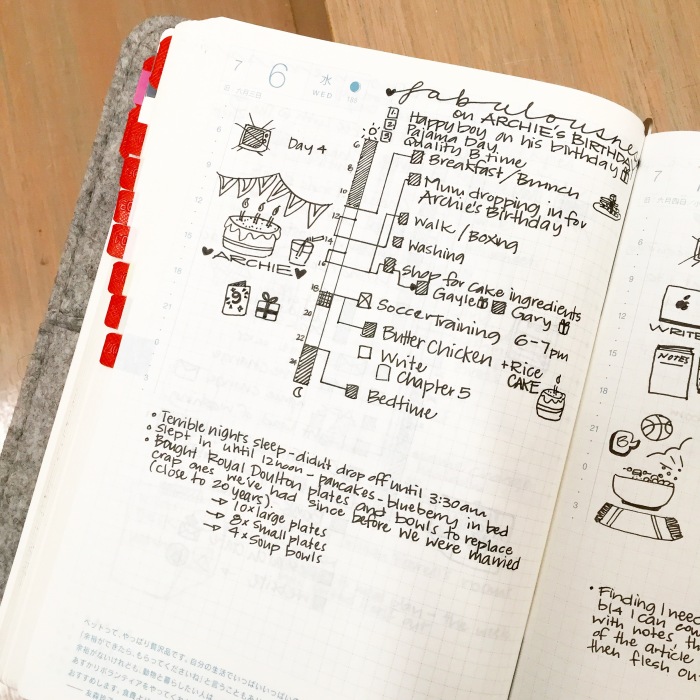
How stupid could one woman be??????? Pretty darn stupid!  Quite clearly there is a timeline EXACTLY like the one I had created on the far left *sigh* which should/could be used like so:

img_3718

I may never live that down in my own mind…Onward and upward.

Plan vs. Reality

When I first stroked my very first Hobonichi it was obsessive possession love.  Everyone who knew me understood the deep connection that I had with regular stationery and that this was something completely different…it was true love ❤

I then felt compelled to tell the entire world (well just my tribe and my poor family members), via the very first post on this very blog, exactly how I was going to use it.  The beauty is that Ryder Carroll’s system is flexible and can be used very successfully with Hobonichi especially for those in the following circumstances:

  • If you like to have separate day pages with space to doodle and journal ad nauseum
  • If setting up daily, weekly, monthly, and yearly spreads from tabula rasa (blank page) seems completely overwhelming
  • If you can’t keep your hands off the smooth, thin yet incredibly tough Hobonichi Tomoe River Paper – like me 🙂

Plan

Originally I planned to use the Cousin in the following ways:

First was the Year overview, much like the bullet journal month spread but all 12 months are over two double page spreads in the Hobo Cousin.  I planned to use the year to two double page spreads like I would my bullet journal month page.  This was to include major appointments, birthdays, school term dates, deadlines for my Ph.D., that type of thing.  Really an overview of the two halves of the year.  I planned to use the three bullet points at the top of the section for pre-planning the month’s focus or theme.

Second was the Month to a double-page spread which I didn’t currently set up in my Bullet Journal prior to the adoption of the Hobo. This is where I planned to hash out the month in more detail, the next level down, including PayDay, cleaners visits, term dates, excursions, events, birthdays, kids parties, and appointments.

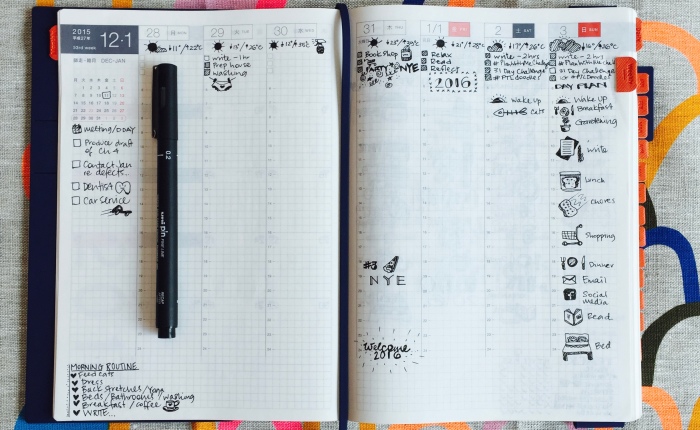
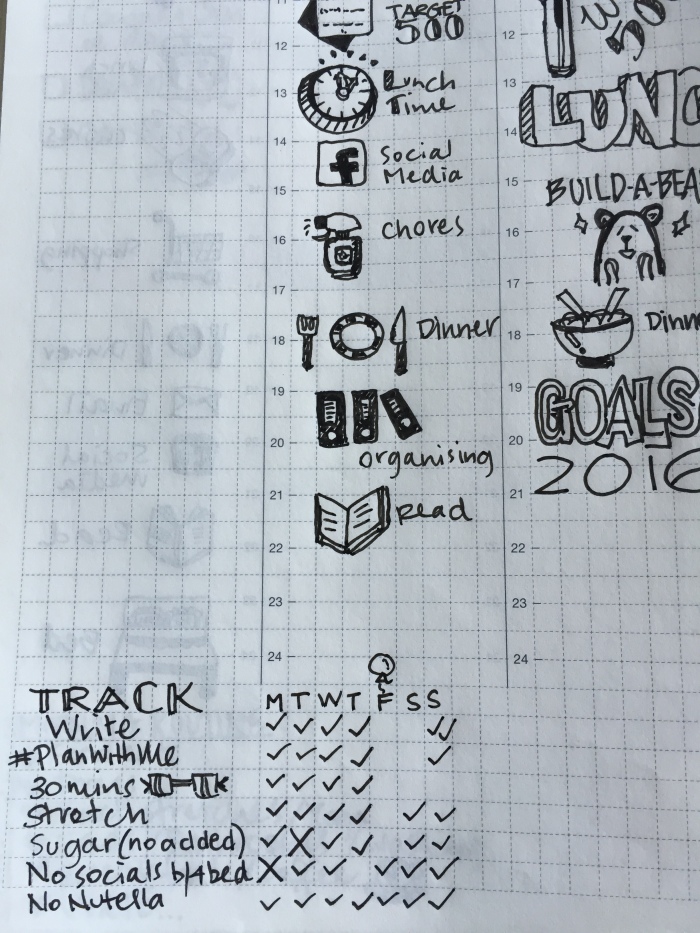
Thirdly was the Week to a double-page spread.  Previously I had used a separate large desk planner for this; planning my day by the hour and making note of large bills I need pay and that kind of detail. This is where I thought I could settle down with a bevvy of an evening and take stock of what has happened earlier in the day or during the week and allocate time to tasks that need to get done the next day.  I also thought this could also be the perfect spot for habit tracking for the week in the space at the side and bottom of the pages.

Fourthly was the Day to a page.  This is STILL where the action happens.  The detailed To-Do list, gratitude list, and the actual record of how I spent my time during the day.

Reality

So how do I really use my Hobonichi cousin after “living” with it for 9 months?

  1. Year Overview – this has remained where I plan out the year at the very beginning with birthdays, term dates, public holidays.  It doesn’t get used for anything else really.  My monthly focus was dropped early on because my focus is pretty monocular THESIS, THESIS, THESIS, WRITE, WRITE, WRITE! Maybe in the future when I’m running a business or working I will use it more for monthly drives…we’ll see.
  2. Month Overview – over time this has become a place for repeated tasks or events that I like to have a record of.  I use it most for paydays and bill payment especially when money is tight (isn’t it always…) and for garbage cycles.  At one point I was recording kids activities here but it just wasn’t necessary because Hubs keeps his eye on all of that.  If I make an appointment for the doctor, dentist, or with my supervisor it goes here first then I transfer it to the weekly section…
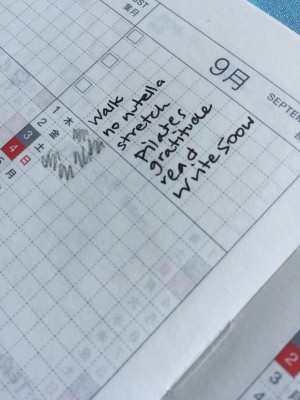
  3. Weekly Overview – My nemesis!  I just don’t really do that much to warrant all the pre-planning and time management I could be performing here.  I like to record the forecast for the week on the left-hand side, the actual weather, and the top three “actions” for the day at the top.  When I was feeling inspired I would doodle the activities I planned for the day in the time slots but I started to feel like I was doing it just for the sake of it not because: a) I needed to and b) because I wanted to.  It was a habit.  Recently I have started ramping up my exercise and clean eating programme and I feel this weekly section would be better used for this focus. Pre-planning meals and exercise daily will now happen in the weekly section. Wellness Tracking is going to need another blog post I think!img_3687
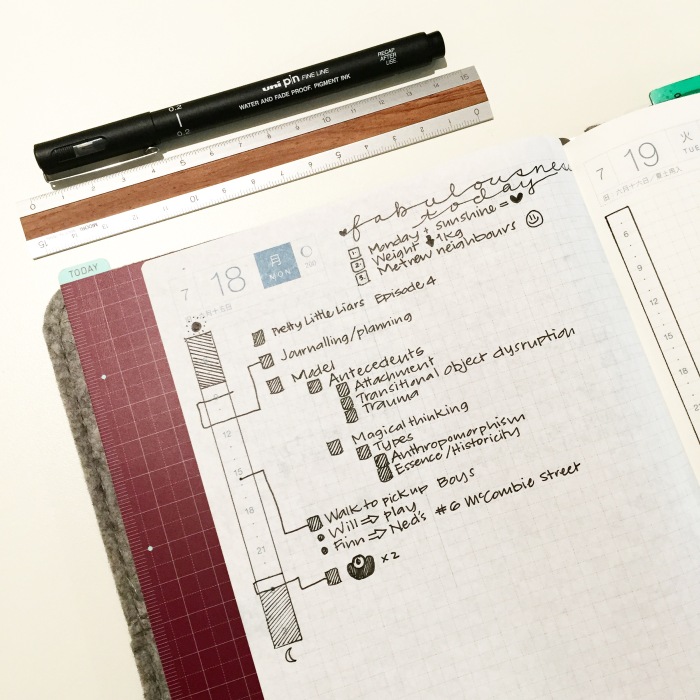
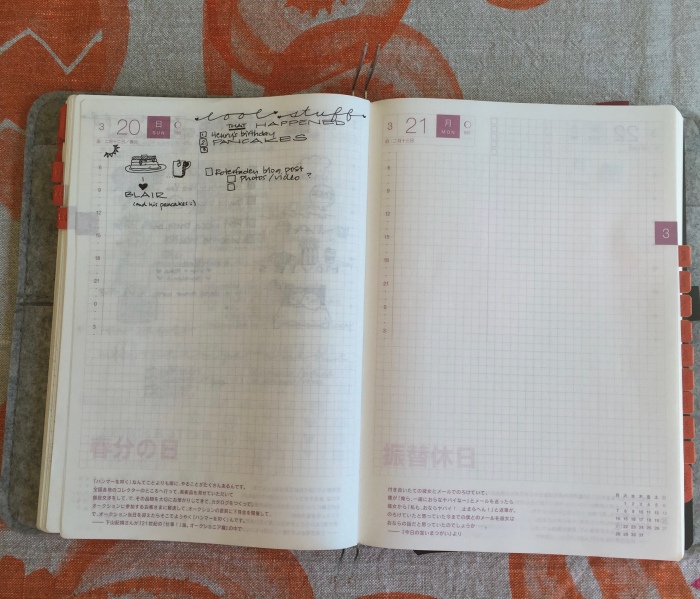
  4. Daily Pages – Still the centre of my planning and recording of what I ACTUALLY did for the day.  I still record three awesome things that happened and some days it is soooo hard to come up with something but I truly feel better about myself and my life when I have.  The use of the vertical timeline to record wake and sleep times and what I did, when during the day seems unnecessary right now.  HOWEVER, I’m going to keep doing it for now because I am about to re-visit the David Allen “Getting Things Done” (GTD) productivity system. Thanks to Kara Benz from Boho Berry and her fantastic post on the Bullet Journal + GTD which reminded me of my love affair with David Allen’s system a number of years back when I was Professional Organising.  I may find the vertical timeline a great asset when that is implemented and I might find the weekly section requires a facelift.

Over the last few months my pages have started to get less doodly (is that a word…according to Grammarly it is) and more serious as my deadlines loom larger and larger in the rear-vision mirror. All I can say is thank GOD for the Bullet Journal System, Ryder Carroll, the entire BuJo community (yes I’m talking to YOU), and the Hobonichi boffins for helping me achieve my goals and become a better me.

My next post will be about my new and improved BuJo Wingman/Sidekick with some product reviews and general hilarity. Hope you come back now y’hear!


Hobonichi & Bullet Journal: Roterfaden Review

Hobonichi & Bullet Journal: Roterfaden Review

It’s been almost two weeks since I received the Roterfaden Taschenbegleiter (translates from German to the English: Red Thread Bag Companion) and it is life changing!

It arrived from the lovely peeps at Baum-Kuchen in packaging perfection; all the little details added to the ceremony of un-boxing.

From the neat wrapping…

IMG_3402

to the letter-press card…and the origami receipt…

IMG_3403

I thought I had died and gone to heaven.

As soon as I unwrapped it I felt like I’d made the right choice.  It certainly isn’t a petite chic planner cover like many of the leather ones on the market and it certainly isn’t “kawaii” but it is stylish, functional, and capacious!

The design is simple and the attention to detail is excellent.

With the ability to hold both the Hobonichi Cousin and my bujo-wingman with ease (as well as a slim Hobonichi notebook) the Roterfaden gives me the portability I need.  This is necessary mostly at home because I am constantly moving from one room to another with my planning paraphernalia multiple times a day.  I do also like to step out once in a while and plan en plain air so this is fantastic!  I can just grab up my Roterfaden and run out the door knowing I have all the essentials needed for a quality planning session.

SETTING UP THE ROTERFADEN TASCHENBEGLEITER:

This cover is the easiest to set up that I have found that fits the Hobonichi Cousin.  It works in a similar way to the Midori Traveler’s, however, the pin system is a bit different to the elastic. I’ll try to give you a bit of a step-by-step set-up guide using a series of photos…I’m not up to videos yet coz I haven’t got the technology but you never know maybe in the future I will… 😉 however, if you really really need to see a video this one is short and sweet.

IMG_3428

This is the Roterfaden empty.  You can see the three sets of pins in the elastic stretchy spine which allows the cover to accomodate large and small notebooks depending on your requirements.  It can also hold a mini iPad in the back  pocket if you need (amazing I know!) but I use that pocket for my pens so I can dispense with the excess accoutrements when I want to travel light. There are also pockets in the front for business cards and other things like sticky notes etc. that you might want to carry around with you.


Start filling the Roterfaden from the back to the front…trust me it’s easier if you want to use two pins in one notebook.  I wanted my Bullet Journal Wingman in the back like this…

IMG_3451

I’m using the pins to divide my Hobonichi Cousin into weekly and daily sections so I can flip quickly from one to another.  All you need to do is flip open the pins as above…lay the notebook in the cover like this…

IMG_3452

Close the pins – bending them down into the centre of the notebook so they end up looking like this…

IMG_3453

All you need to do then is go to the front section of the notebook, where ever you want the pins and do the same thing as above.  I like to use the final set of pins to mark the weekly section of the Hobonichi Cousin in the front so I can easily find the current week!  When the week is over you just open the pins out, turn the page, flip the pins down et voila the new week is bookmarked!  This is also great if you’re travelling and want to keep your receipts or a map in a safe place…flip up the paddles and place in the loose paper, close the paddles and away you go.  I know, I know, genius right?IMG_3441
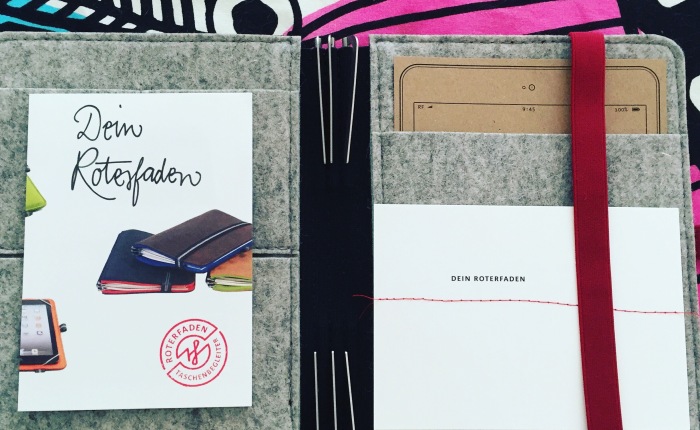
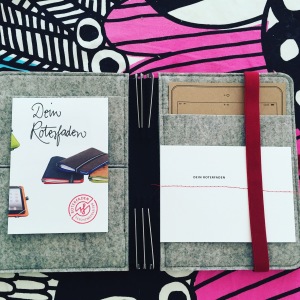
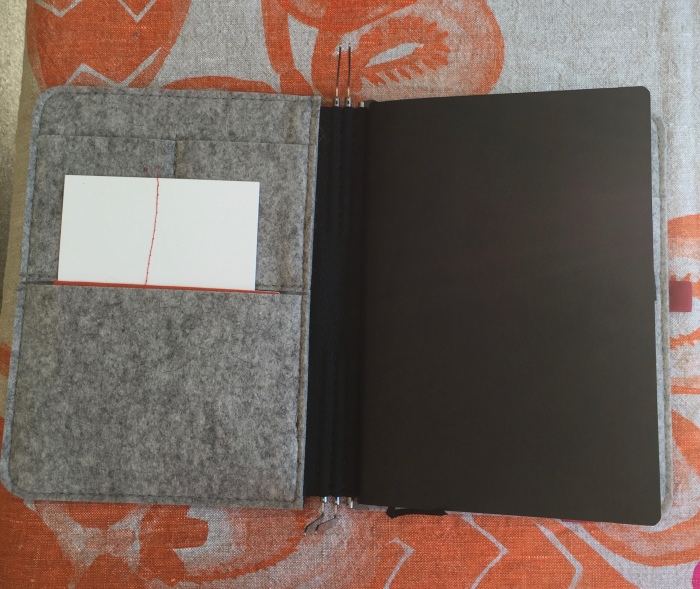
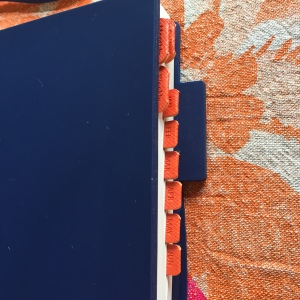
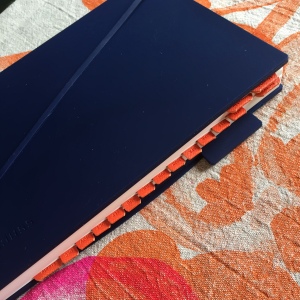
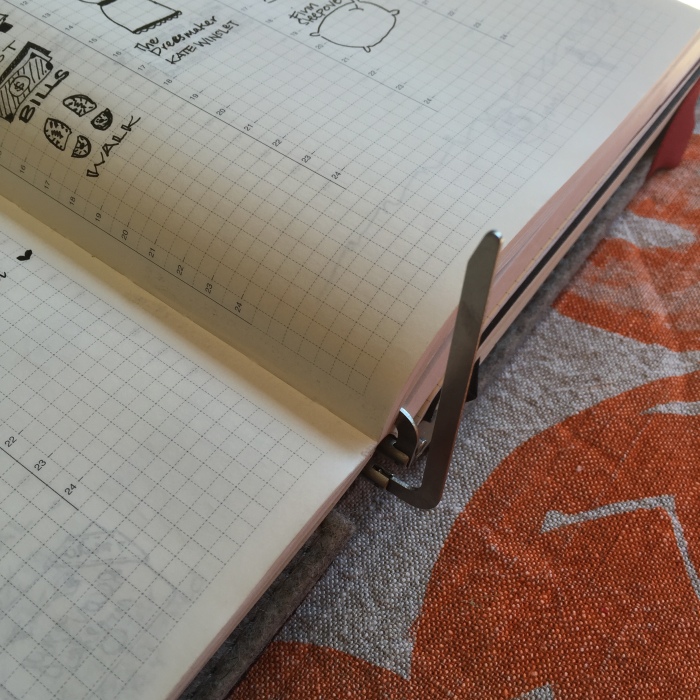
So you can see here how it can accomodate pretty much any type of notebook you require.  Even hardcover notebooks if they have a gap between the spine and the pages.  How you ask?  I was dying to tell you anyway.

IMG_3442
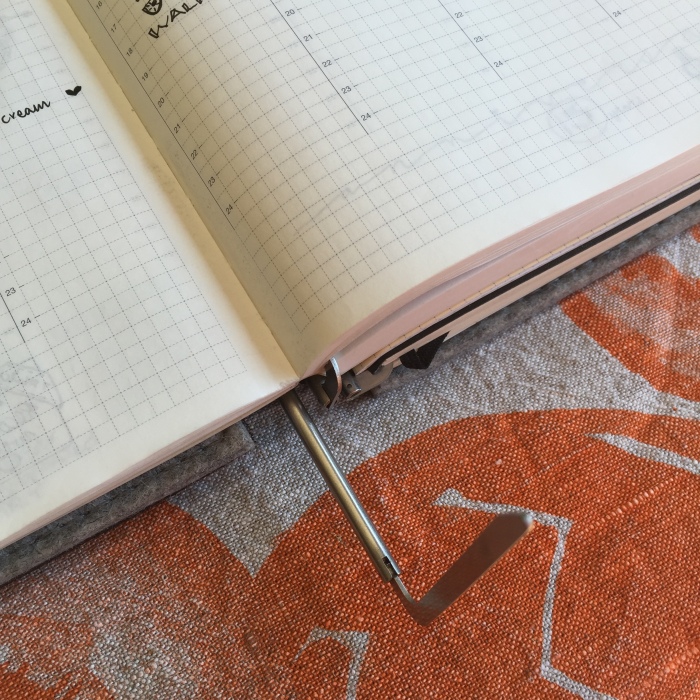
Because the Roterfaden pin system is completely customisable you can actually remove the pins if you aren’t using them (maybe you’re travelling and don’t want the weight so you leave two sets at home so they don’t get lost).  This also allows you to pull the pins out, as above, and bend the paddles (that’s my name for them anyway – don’t laugh) as you push the pins in to insert the paddle between the spine and the pages of a hardcover notebook (like a Moleskine or Leuchtturm1917).

So check out the Roterfaden website configurator if you want to create your own combo of felt lining, leather cover, and elastic strap – there are a number of options.   I chose to buy mine from Baum-Kuchen because I really liked the dark brown leather combo they had and thought I would get it quicker if I went with a SOH item…but if you have your heart set on fuchsia felt and black leather with an orange elastic strap and your initials then check out the website 🙂 – go on be an individual…you know you want to 😉

At $132US +postage it isn’t a cheap option and I’m sure there are other alternatives but I think I’ll love it for quite a few years yet…

Have an awesome one!

Jxxx

P.S. this post is dedicated to Jess from @plannerbynature check her out on instagram or on her blog aplannerbynature.wordpress.com .  One day my darlin girl this will be yours 😉 (I’m going to leave it to you in my will…).

My Bullet Journal Wingman :)

IMG_3343

I’d like to introduce y’all to the new member of my bujo family—the Leuchtturm1917 A5 soft cover, squared notebook affectionately known as the “Wingman” or the “Sidekick” as Kim Alvarez from Tiny Ray of Sunshine calls it.

The Hobonichi Cousin is fabulous—I mean totally awesomely fabulous BUT as fans of the Hobo have been discussing …

Where to put collections?

There is only a small number of pages in back of the Cousin and I needed WAYYYY more than that.  I searched high and low for a notebook with high quality paper so I could use my new fountain pens in it if I so desired. Numbered pages was also something I wanted if I could get it and an index (this is one of the problems with Moleskines, which were previously my fav, unpaginated with no index 😦 ).

The other thing I needed was a thin notebook with a soft cover to slip in behind my beloved Hobonichi Cousin and still use the strap on my Hobo cover to keep it all together…this was all before I discovered and ORDERED the AMAZING Roterfaden that has the supernatural ability to solve the “bundling” problem…

Stay tuned because I’m going to give you a look at how my hobo-bujo-roter family are changing my life 🙂 very very soon…

I soon found the Leuchtturm brand had the perfect thing.  I bought mine (I ended up ordering 2 just coz) from Larry Post in Australia.  It ticked all my boxes and some boxes I didn’t know I needed ticked!

LEUCHTTURM1917 A5 SOFT COVER NOTEBOOK:

Page marker  | Numbered pages| Contents page | Expandable Pocket | Elastic fastener | Ink proof paper | Thread bound | Perforated pages | Acid free paper | Stickers for labelling

So I’ve started setting up pages that spoke to me from other amazing bullet journalers like:

Kim – @tinyrayofsunshine

Kara – @boho.berry

Jessica @prettyprintsandpaper

Kacheri – @passion.themed.life

Dee – @decadethirty

Jess – @plannerbynature

and some of my own inventions (well it’s impossible to know actually if it is your invention or if you saw it somewhere in the past and forgot where the idea came from), which I can’t wait to share and get your feedback on so I can make my bujo wingman as successful as possible 🙂

Love this community, love you guys!  Keep on bullet journaling and supporting each other coz it’s kinda inspiring 😉


jxxx


Hobonichi & Bullet Journal: Roterfaden to the rescue!

Hobonichi & Bullet Journal: Roterfaden to the rescue!

IMG_3348

I know I’ve waxed lyrically about the Hobonichi and how fabulous it is…but there is still one big problem—the collections.  Where do they go?  How do  I keep the whole package together?  So I looked at how others were dealing with this conundrum.

SO… how to keep my hobonichi bullet journal AND my collections notebook together forever like the BFF’s they are?

I’ve been tearing around the www to find something that solved the problem of housing my two or more A5 notebooks in a way that is effective and doesn’t lead to me leaving one or more behind at some random cafe.

I think I’ve found it—but…

You guessed it!  It involves me spending more money 😦 HOWEVER, it is a really really great solution that I think will keep me happy for a few years to come (OK until the next time I want to buy something pretty)!

I stumbled across Roterfaden – which is a German brand of notebook covers that uses a unique pin system to hold in notebooks—somewhat like the Midori traveller’s notebook’s elastic— but it seems to be more robust and capacious enough to handle both the Hobonichi Cousin and another medium-thick notebook with room to spare.  It has this elasticised spine that allows it to stretch to accomodate more notebooks (a bit like preggy pants 😉 ) and looks amazing see!  The lining is felt, outside is leather, with elastic strap and pen loop.  You can buy it directly from the Roterfaden website—where you can configure it anyway you like (3 pins or 2, leather or faux leather, pocket variations, and choose the elastic strap colour you want) OR you can go to the Baum-Kuchen website in the US and order the “standard” version which comes in a few different leather colours (light & dark brown, black, and light and dark grey) and has the standard light grey felt lining, red elastic.  Check out Julia from Julia’s Bento on youtube taking you through the features it.is.AWESOME

SO…

I ordered one from the Baum-Kuchen website in dark brown because I liked the classic look and LOVED the red accent of the strap and it seem easier that wading through the configuration process.

I.CAN’T.WAIT.FOR.IT.TO.ARRIVE 🙂

Wait for my up-date when I have the Roterfaden in my hot little hands 😉

Next post I’ll take you through which notebook I have chosen as my bujo & hobo wingman 🙂


Hobonichi & Bullet Journal: February Review

Hobonichi & Bullet Journal: February Review

Well this has been a long time coming.  I’ve been promising to give you a run down on how I found my plan for my planner…how my hobo & bujo are doing…so now is the time!

Well it’s a match made in heaven —with some caveats which I will talk about here and show you my solution in a separate post.

So—let’s do it!

By the by can you tell I’ve just worked out how to do an em—dash on my Mac?  Pretty obvious isn’t it…I’m using it all.the.time.  “How do you do an em—dash, like that one there between the em and the dash, I hear you ask?”  I’m so glad you’re curious because I love a hot tip myself.

Option + Shift + -minus sign concurrently. Cool ha?  Put that one away for safe-keeping.

Now back to the hobo & bujo…

First was my yearly overview and this was my premier disappointment.  I didn’t really use it much at all, finding the monthly and weekly views enough macro to keep me happy and when Jess, @plannerbynature put up an IG post showing her habit tracking idea for the yearly overview I was devo because that was the perfect use for this section.   Because I’d already inked up the yearly view there was no turning back so I had to stick with the plan.  *Sigh* there’s always 2017.

IMG_3158

So using the 3 bullet point section at the top (horizontally) for each habit like Jess does would be awesome.  Moving on from failure is the best thing to do—(hehehehe just laughing at my over-use of the em dash) onwards and upwards.


Second was the month to a double page spread or, as I called it the other day, my monthly which got me some strange looks (when I combined these two phrases I was shown the door :/).

This is exactly what I intended it to be used for and I love it! This is the section I document the family’s major appointments, birthdays, school term dates, deadlines, birthday’s and parties.  I now also record basketball game times for both my husband and son and check off if Archie (my youngest) and Finn (my eldest) actually attend their activities.  I wasn’t capturing that and found I would often want to use the info to discuss commitment and follow through with them but I didn’t have a log of it.  My monthly to the rescue 😉

Third was the week to a double-page spread. My plan was to do my time allocations here at night for the next day.  I thought I would be able to allocate time slots to the day’s activities and detail the top 3 for the day; my top 3 tasks that absolutely MUST happen.

This slideshow requires JavaScript.

I stuck to this pretty much.  I added the weather at the top of each day.  The high and low temperatures for the day plus a doodle of the conditions – cloudy, partly cloudy, sunny, stinking hot, etc.  I really like to have a record of this and it has come in handy more than once because the weather does help you to remember what you did on a particular day.

I kept the weekly completely monochromatic but did try some colour at one point; I didn’t like in the end so I stuck with black pen only.

At this stage, almost 2 months in, I have no complaints with the weekly plan I am currently using.  I soon realised I don’t have that many different things to do it’s really just: write, exercise, housework, blog but I know I could utilise my time better so next month my goal is to spend more time at the end or the start of the day planning out my time in more detail.  Maybe even by Pomodoro…25 minute blocks…?

What was a bit unexpected was the sketchnoting/doodling that pored out of me in my weekly pages.  I loved creating these little sketches by looking at others efforts (thank you—hopefully you know who you are already) for inspo and also using Pinterest to look up icon vectors for the topic.  I realised I need this creative outlet.  I can spend hours doodling and messing around with new icons; it’s really my idea of fun 🙂 and I feel like I’m in the flow (if you haven’t read “Finding Flow” by Mihaly Csikszentmihalyi (pronounced chick-sent-me-hi) then don’t try coz it’s a bit dry—amazing but very dry, just watch this TED talk).

Fourth is the Day to a page.  This also evolved into a fun sketchnotey area to visualise what I had to do for the day in bullet form which I can check off as I go by shading in the square bullet.

I didn’t log my food intake…I never quite get around to that—ever.  Wonder why that is? I read somewhere that tracking water intake is next to useless (controversial I know) and I never keep up with it anyhow so that went by the way side.  My gratitude section has stayed but I have reworded it to be “cool stuff that happened”… just worked better for me.

IMG_3335
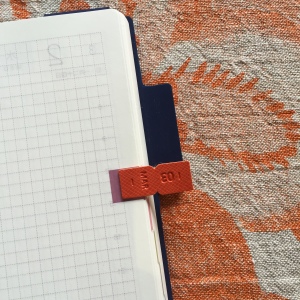
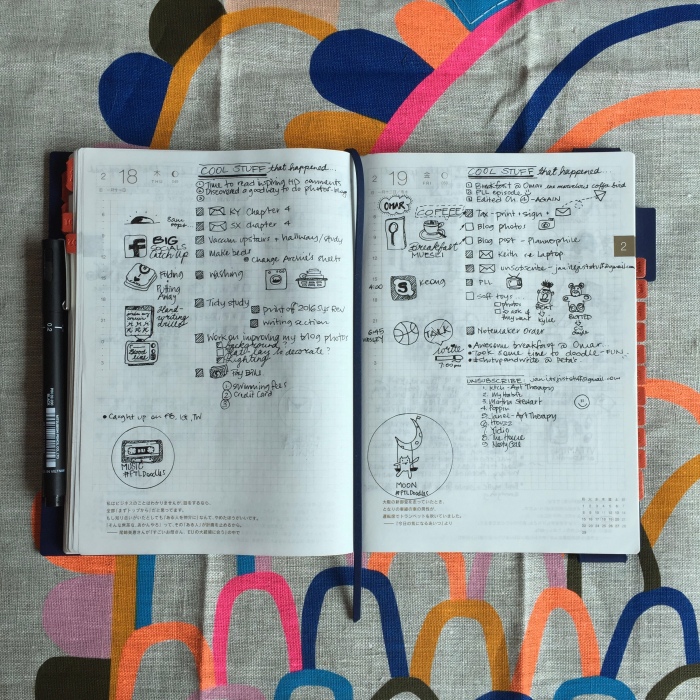
In the daily page I take note or sketchnote what I actually achieved for the day so I can compare it with the planned day in my weekly section…which can be very enlightening sometimes :/ .  I also write down any highlights of what happened should I need to reflect on it later.  My learnings section was dropped too.  This was something I didn’t originally plan to do but decided I liked the idea of so I adopted it.  I soon started to find it hard to come up with anything and began writing down trite crap (excuse the language) so I dropped it.  Instead I put in challenges or doodles or something.  Here’s a little montage 😉 —I love a good montage (actually it’s not a montage but I wanted to write montage).


Overall I’m pretty happy with the results.  This is the first time EVER, in the history of my life, where I haven’t missed a day in my journal or bujo so I think that’s a strong recommendation for the hobo/bujo marriage.  WHY?

Four reasons:

  1. aesthetics – I am an aesthlete so the fact that it looks good keeps me committed
  2. creative outlet – being a PhD student is creative cognitively but not physically so this gives me some “me” time with a practical purpose underlying it
  3. logical – bullet journalling makes sense to me
  4. layout – the hobo gives me the structure I need  all in one package without the hassle of drawing up my own layouts (I think I would have given up already if I had to draw up all the layouts I want and need).


BUT, I hear you cry—what about COLLECTIONS…?

This is the small problem with using the bullet journal system with the hobonichi cousin. But that is something for my next post.  I DO have a solution and I think you’re gonna like it.

How’s your bullet journal looking?  I’d LOVE to hear from you.  Any feedback for me?  I am going to try to start posting more regularly both here and at hoardinginsite.wordpress.com  …with the help of my hobo&bujo 😉 so keep an eye out!

Cheers,

Jxxx


bullet journal habit tracking in the hobonichi cousin

bullet journal habit tracking in the hobonichi cousin

This little post is for Lola – she asked me how I track recurring tasks and habits in my hobonichi cousin.  This is the way Jess at planner by nature  does it:


IMG_3158

and I like that…unfortunately I had already started using this for major events like birthdays, term dates, surgery dates etc.


Sooooo what I did myself was :

IMG_3159

a little weekly habit tracker at the bottom of the weekly page, this way I can have multiples if I like across the bottom of the page.

How do you track your habits in your Hobonichi Cousin?  Let me know in the comments.

Love Jxxx

Tabulous…

Tabulous…

Tabs, glorious tabs.  Love, love, love em.  Quick access to sections of textbooks or notes at uni – colour code stuff.  I’ve always been a big fan.

A couple things I DON’T love about them:

SIZE does matter.  I’m not really keen on how much of the page they take up especially these ones (that I had to modify by cutting off the colour strip) from Post it that I used in my Hobonichi Cousin.

LOOKS do matter.  I have this gorgeous, sophisticated planner with tabs that I home made.

IMG_3053
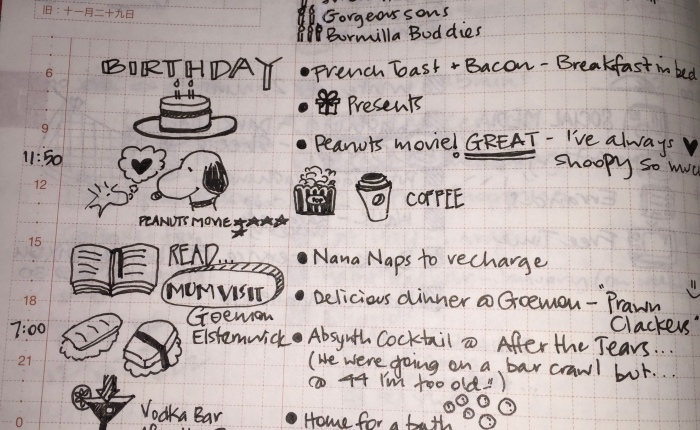
NOT that being creative and tailoring things is bad by any stretch but MY attempt wasn’t flash so it looked a bit meh.


Basically I wanted something small, made specifically for journals with monthly, weekly, and daily spreads that would pimp my Hobo.

Once again I used my research skills for (sort of) good and trawled the www…

As luck would have it I was concurrently looking for a pencil case.  I had seen ones in Japan that either opened flat or that had a wide zip opening so you could see all the pens without taking them all out…

I’m just gonna detour briefly with the pencil case I found… 😉

Awesome right?  SO while I was checking out this AMAZING Korean site Fallin Design it was like a scene out of Pitch Perfect –  you know like the angels singing and the clouds parting and…”AHHHHHHHHH” OK you get the drill…

I stumbled upon THE best TABS EVA!!!!!!! That fit all my requirements 😉

IMG_3057 IMG_3058

So these are little faux leather tabs that come in a small range of colours – that are permanent (unfortunately – however I’m not sure I’d really want to take them off…) and look SO professional…

Although I’m using the Hobonichi Cousin these tabs can be used on any bullet journal; it all depends on how you’re setting it up.  If you lay everything out at the beginning of the year or for the first 3 months you can tab all at once or tab-as-you-go.  Whatever floats your boat.

How about I show you how they work.

Step 1: Squee with delight when the package arrives from Korea 🙂

Step 2: Make sure the cats are not ready to pounce as this is delicate work and you don’t want to put the tabs on skew-whiff…or get a paw stuck in them :/

Step 3: Decide whether you want the month name or the month number facing the front…

Step 4: Open the planner to the page you want to mark and line up the edge of the tab carefully like this:

IMG_3065


Step 5: Turn the page over and carefully bend the tab along the seam – making sure to line up the edge of the tab with a visual reference (in my case I used the edge of the page boarder):

IMG_3066
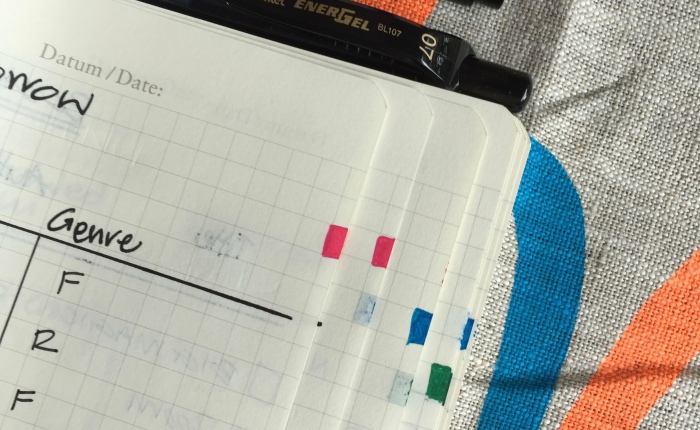
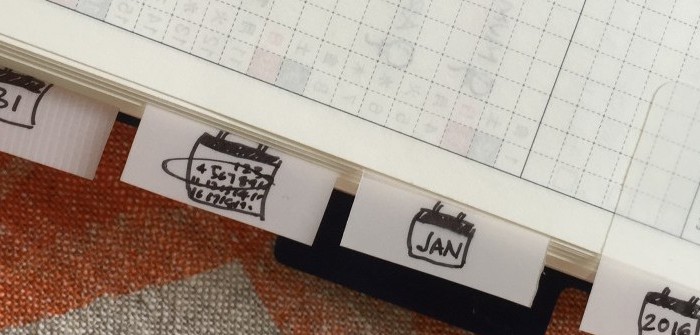
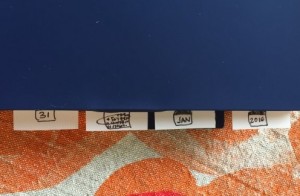
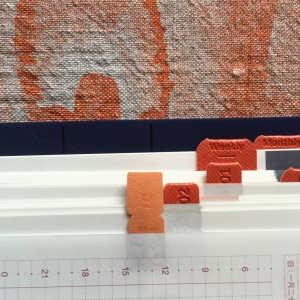
Think about how much of the tab you want to stick out.  Then press the two sides gently together…


Then move on to the next month 🙂

IMG_3067IMG_3070     IMG_3068 IMG_3069

I admit I actually bought two sets because I didn’t know which colour I would like on my navy Hobonichi Cousin so I also tabbed up my Hobonichi Techo with the spare set:

IMG_3072  
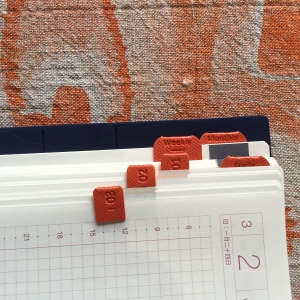
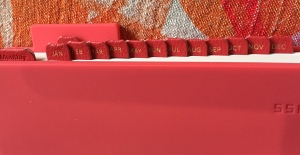
I prefer these tabs because they have a lower profile on the part you attach to the page which means the paper doesn’t get “caught” on them as much.  Having said that, now that I have set it up, and I’m actually using the journal, it’s not  a problem…

Do you have any awesome sources of saucy stationery?

Get on board and comment babes (and dudes…I guess 😉 )…

We Out!


Buy Moleskine – Professional Workbook – A4 – Grid – Soft Cover – Black – NoteMaker.com.au

Moleskine’s answer to the Leuchtturm1917 for the Bullet Journal fraternity…

This new soft cover workbook from Moleskine is an indispensable tool for the busy worker or student. With spacious A4 squared pages (with heavier paper), a useful index, numbered pages, note pages, detachable sheets and to-do lists, managing projects will be a breeze! This workbook also features Moleskine’s trademark elastic closure, a ribbon bookmark for multi-tasking and a double expandable inner pocket in cardboard and cloth, ideal for keeping track of receipts and loose sheets of paper.Moleskine notebooks- renowned for their quality and elegance– are the perfect gift for creative and discerning types.

Source: Buy Moleskine – Professional Workbook – A4 – Grid – Soft Cover – Black – NoteMaker Stationery. NoteMaker.com.au

Would this work for you?